Game interface & mechanisms interlude
And now, before I (finally) get to play my turn, a little more information on the game interface & mechanics. If you wish to simply follow this AAR and don't mind missing out on how the game works, feel free to skip this installment.
Note that the game is hex-based - I've simply deactivated the hex grid to make it more pleasing to the eye.
General interface
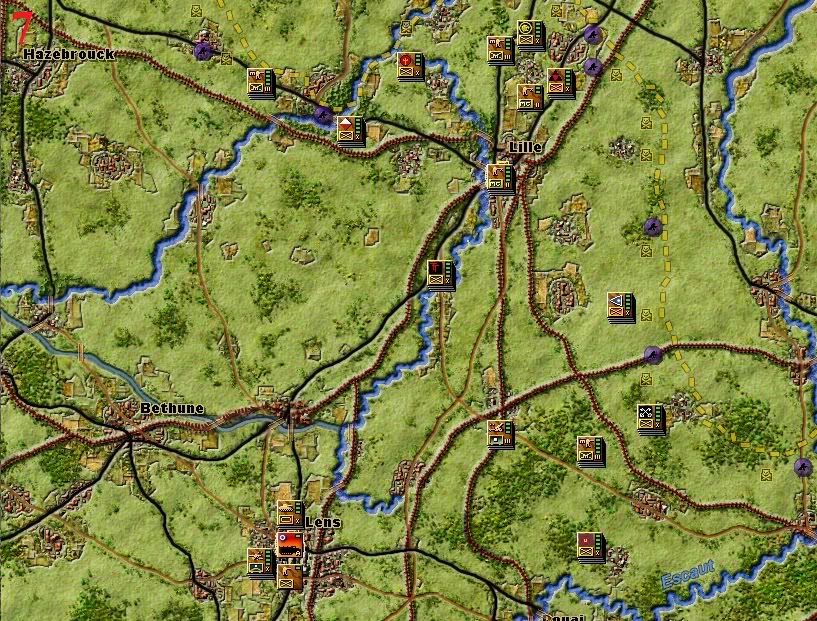
Let's start with the interface. Most of the screen is taken by what I call the
tactical map or
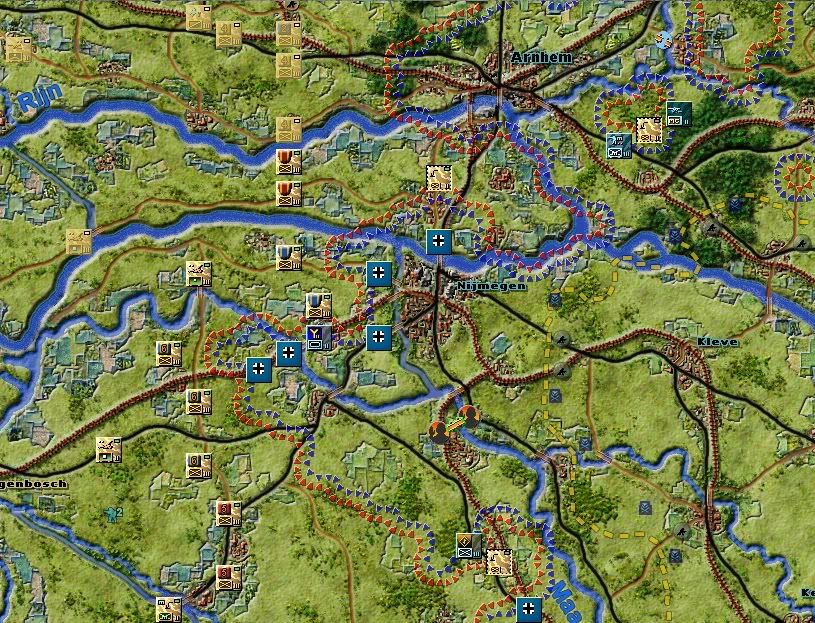
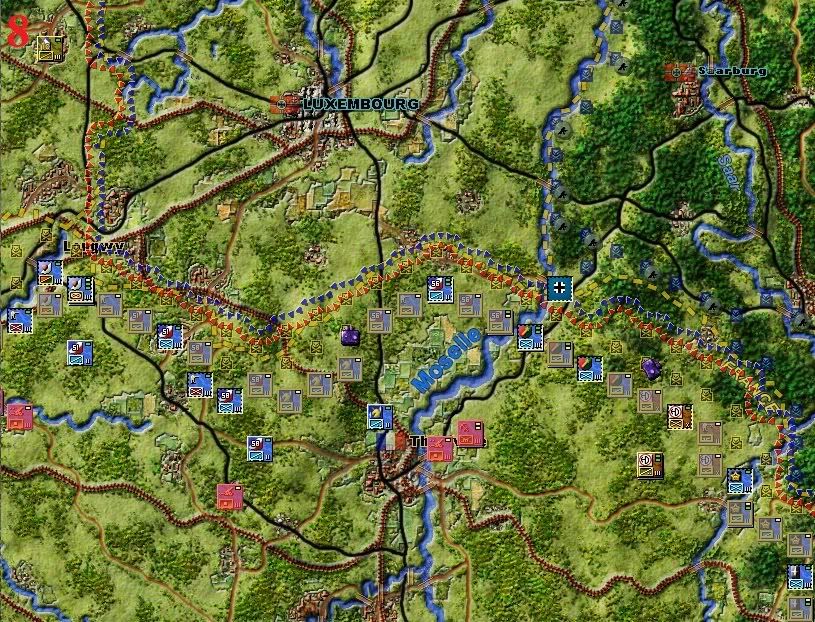
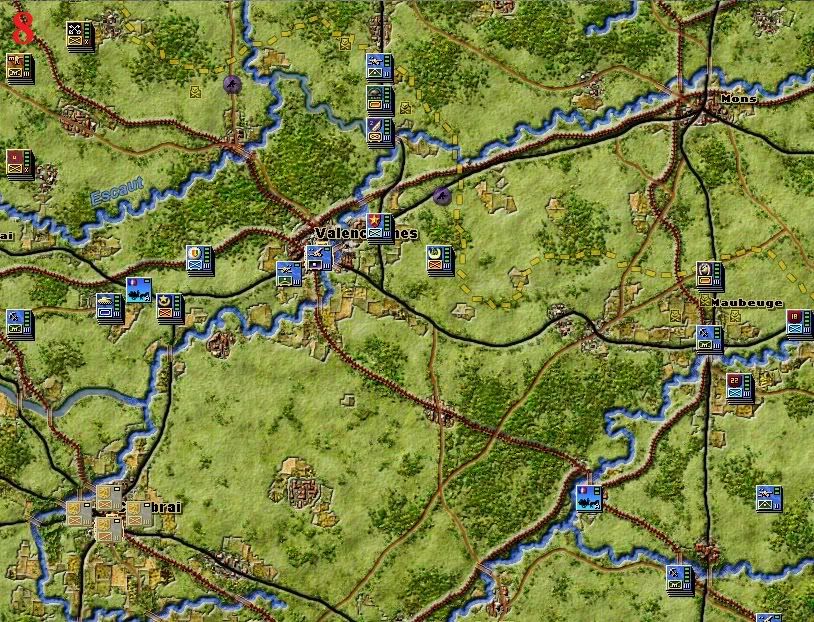
tactical view. Here, it is a shot of the 1st French Army waiting near Valenciennes, just south of the Belgian border (yellow dotted line). You can also see three divisions from the BEF, which is located northwest of the French 1st Army.
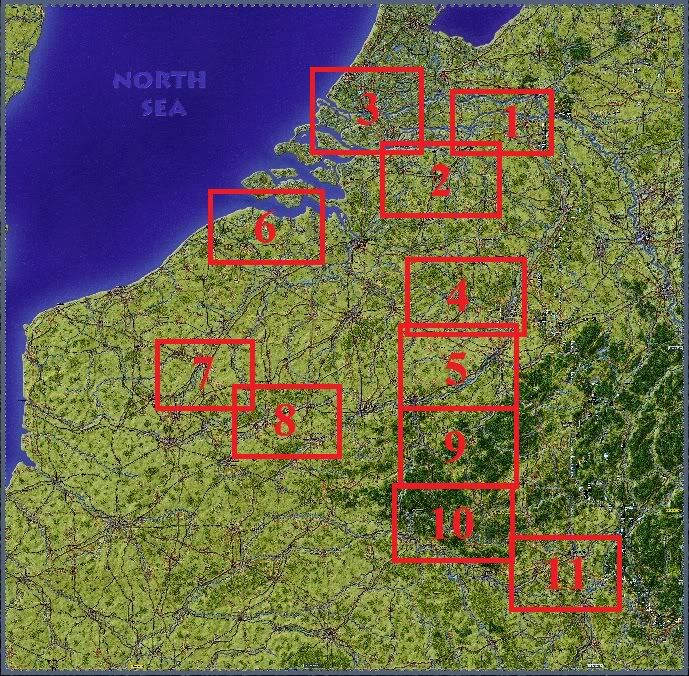
Next, the
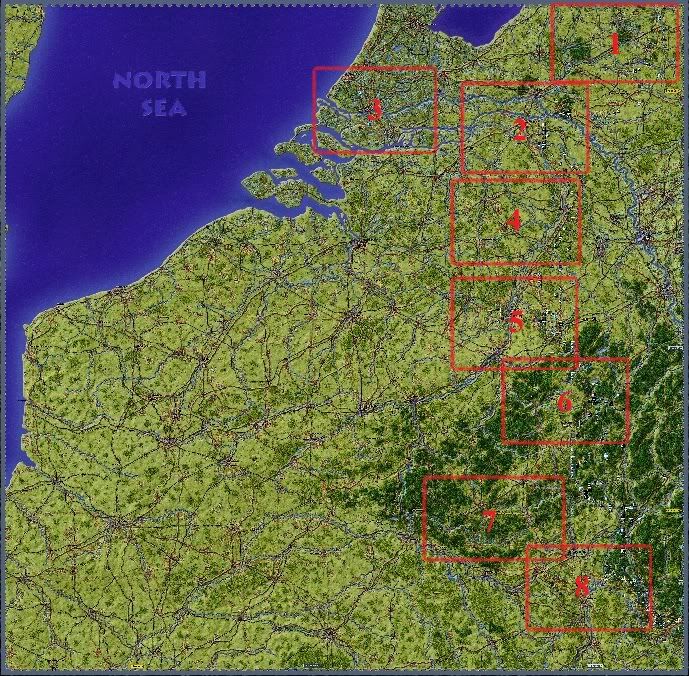
strategic map is located on the upper right of the interface. The little rectangle shows where the tactical view currently is. The red line is the current frontline and the yellow dots show where my units are. Unfortunately, this map is very small: it can be zoomed in by clicking on one of the two buttons on the left but then, the frontline and units disappear.. The frame above shows the current turn number, general supply condition (currently 100%), and air and ground condition. The big red button is the end of turn button.
Directly underneath the strategic map is the
unit display. Here, I've clicked on an hex where there is a stack of four units - all of them from the French 2nd North African Division. Each regiment/unit can be selected individually of course. On the tactical screen, the radius around the selected division shows its command radius - as long as all of its regiments are within a 3-hex radius of each other, they get a bonus to their attack and defense values (see below "Unit composition and movement"). The bright hexes on the tactical map show where those regiments can move. It depends on their movement points - if I had only selected the recon battalion, more hexes would be brightened (more on that later in the "Unit composition and movement" part).
In the lower part of the interface, underneath the tactical view, are located three rectangular and two round panels, as well as a close up view of the selected unit. From left to right, the first rectangular panel is the
interdiction and defense assets panel: there, I can select available interdiction (aerial, partisan) and defense (minefields, strongpoints) assets and place then on the map wherever I wish.
The middle rectangular panel is the
transport panel, where I can use available transport assets (trucks, trains and boats) to quickly move my units around. You can't have more than four of each assets each turn (4 trucks, 4 trains, 4 boats) but you actually often get less. For example, I'll only start getting naval transports in the second half of the scenario when I may want to start reembarking my troops. Each transport asset carries one regiment, not one division, so they have to be used with care.
The final rectangular panel on the right is the
replacement panel: there, you can assign available replacements to mauled regiments. There are two types of replacements: infantry and mechanized (the former being a little more plentiful than the latter).
The two round panels have a lot of buttons giving access to options screens and such. Let's forget about them. Only note the little French flag in the bottom left of the screen: using the arrow button on the left, I can switch to other Allied nations (UK, Netherlands, Belgium) which all have their own interdiction and defense assets, transport and replacement panels - for instance, the Belgians don't have any truck assets.
Unit composition and movement
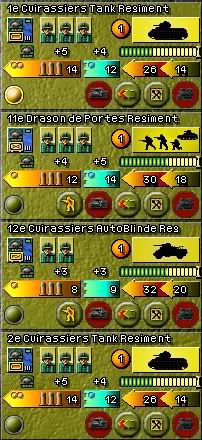
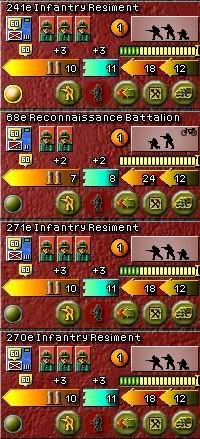
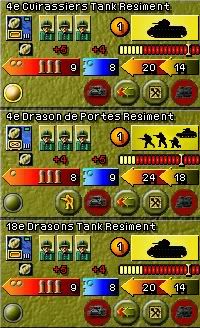
Here are so close-up shots of four different divisions, so you can fully appreciate the differences between them. From left to right: the 3rd DLM, the 22nd French Infantry Division, the 60th French Infantry Division, the 3rd British Infantry Division.
Division composition: as you can see, a regular infantry division is composed of three infantry regiments and one recon battalion. Composition may vary and some divisions are only three-regiment strong but overall, most divisions have four regiments. The 3rd DLM has two Somua medium tank regiments, one mechanized infantry ("dragons portés") regiment and one recon battalion.
Background colors: Background colors differ depending on the quality of the unit. The 3rd DLM is an-all elite division: its four regiments have a golden background. Elite divisions get small bonuses in combat. The 22nd French Infantry Division is a regular combat unit, with a grey background. The 60th French Infantry Division is a substandard unit, with a light red background. This is BAD: when attacked, its regiments might surrender without even fighting. In this scenario, the chance to surrender is set to 40%. There are ways to reduce it to 20% (if a regular or elite unit is in an hex adjacent to it) but the only way to make sure they never surrender is to stack them with regular or elite units. Finally, the 3rd British Infantry Division is regular but for one elite regiment of the Guards.
So remember: elite (gold) > regular (grey) > substandard (red)
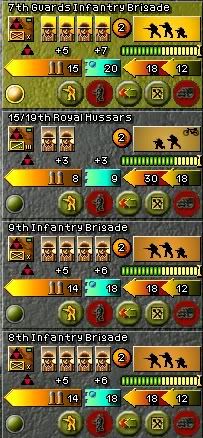
Regiment details: at the top of each regiment display area is the name of the regiment. Directly underneath it, from left to right:
1.
Unit counter (as seen on the tactical map)
2.
Steps: the "step", represented by a little soldier head, is roughly equivalent to a company or a battalion. The number of steps a regiment has shows its number of men (or tanks for armored units): as such, the number of steps a unit has is a way to gauge it
size, not its
power - though obviously, they are often related. During combat, a regiment might have casualties, resulting in the loss of one or more steps. If all steps are destroyed, the regiment is destroyed.
REMEMBER THIS!
Note that infantry regiments have more steps than recon battalions - they're bigger. Also note that British infantry regiments have four steps while regular French infantry regiments have only three steps: they're actually brigades, not regiments, and thus have more men.
3.
Timed replacements: the number in the little yellow circle is the number of timed replacements this regiment has. Timed replacements simulates the ability of a unit to replenish its forces on its own after some time (woundeds get out of the infirmary, damaged tanks are repaired, ...). When a unit loses a step in battle, the timed replacement is automatically used, though it take a few turns to replace the step. When possible, I will send such mauled units to the rear while they replenish their lost step(s). Also note that British brigades have more timed replacements than their French counterparts. When a unit is out of timed replacements, the player has to use regular replacements from the global pool.
4.
Unit picture: allows the player to know with a quick glance the type of regiment this is (leg unit, motorized unit, tank unit, ...)
Now to the middle part:
5.
Attack and defense bars: the attack (orange) and defense (turquoise) bars show each regiment's
attack and defense values. The little numbers above are the divisional integrity bonuses I spoke of earlier.
The two
bullets on the attack bar represent the regiment's supply: when a regiment does something (entrench, use extended movement, attakck a unit, is attacked by a unit, ..), one bullet will be consumed. Units can only do one action each turn (i.e they can't attack an enemy unit and then entrench in the same turn).These bullets are replenished at the start of each turn only if a unit is in a supplied hex. If all bullets are used, the regiment becomes "isolated", which is very bad - it's basically out of supply. Note that units from the 3rd DLM have more supply than infantry units.
REMEMBER THIS!
Finally, please notice the little dots on the attack and defense bars of the 3rd DLM's regiments: these represent the
shock (on the attack bar) and
anti-shock (on the defense bar) capabilities of these regiments. Armored units have high shock values: when they attack infantry units with low or no anti-shock values, they'll inflict additional damage. Stacking an infantry regiment with an independent anti-tank guns battalion mitigates this effect, as those units provide some anti-shock for friendly units in the same hex.
REMEMBER THIS!
6.
Movement capability: each unit has different movement capabilities. The lower number shows the basic movement capability of the unit, while the higher number shows its movement capability if it uses extended movement. The bar above shows the regiment's fuel reserve (energy reserve for leg units). Green is fuel, yellow is what can be used this turn if using extended movement, and red is depleted fuel (all those units haven't moved and have full supply, so you can't see any red). A unit can potentially be rendered incapable of moving if it uses all its fuel. Units are ressupplied at the beginning of the turn as long as they're somewhere where supply can reach them.
REMEMBER THIS!
And now at the bottom:
7.
Bottom buttons: from left to right, they allow the regiment to leave a detachment (I'll show an example during my turn), to take a regular replacement (only available when the regiment is missing at least one step), to use extended movement, to entrench, and finally to use truck movement (this can also change to train or boat movement).
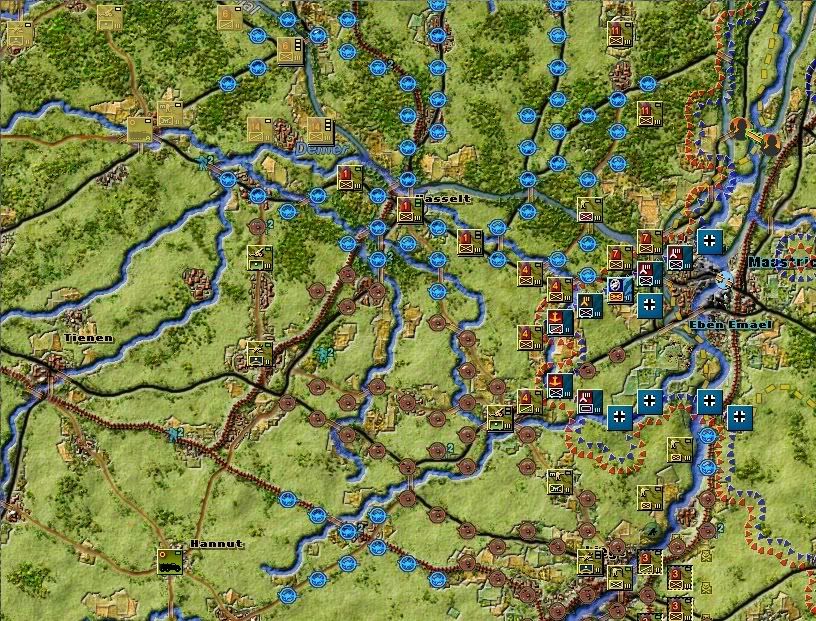
Supply
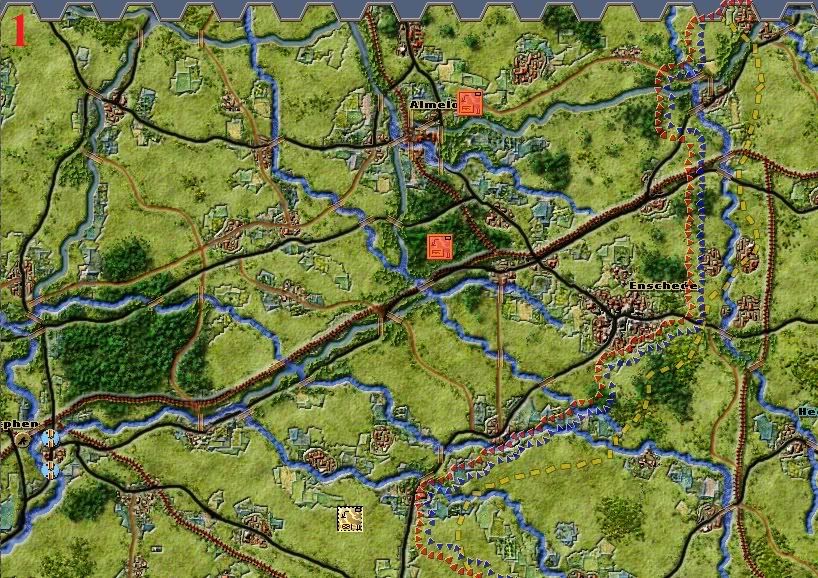
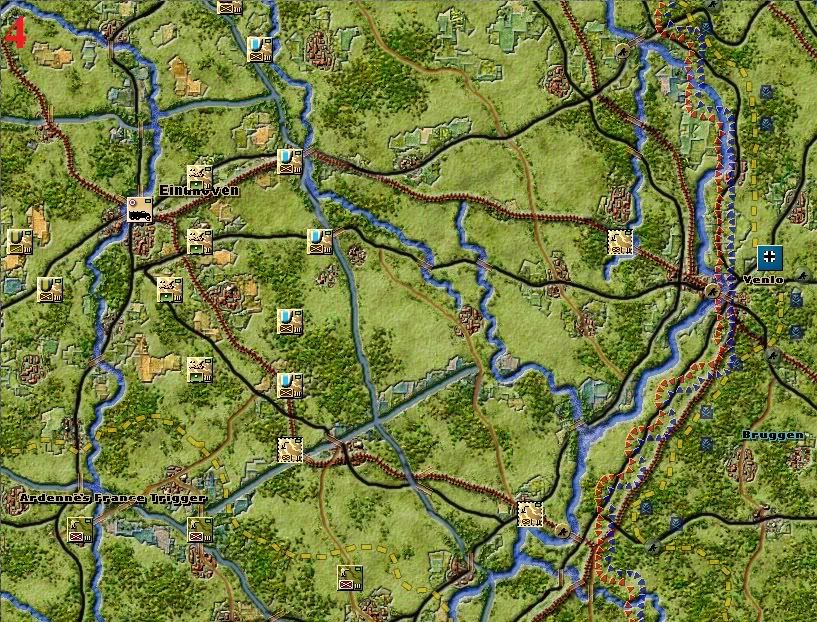
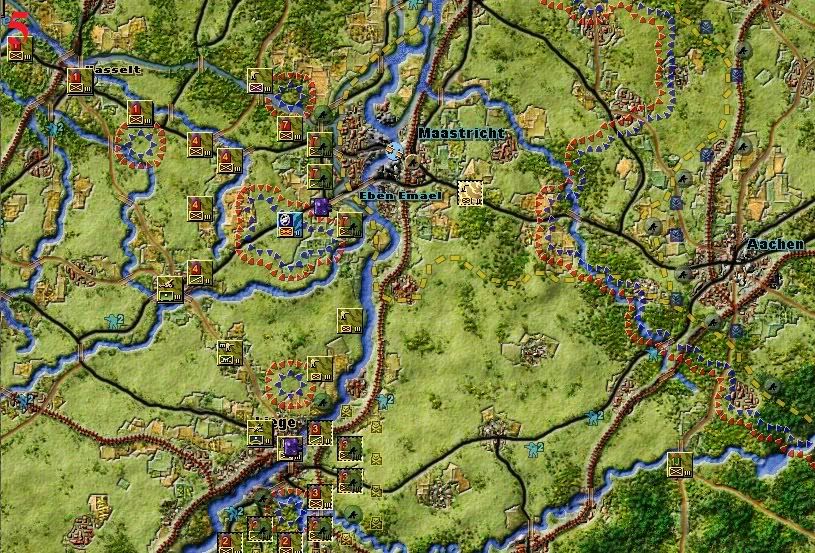
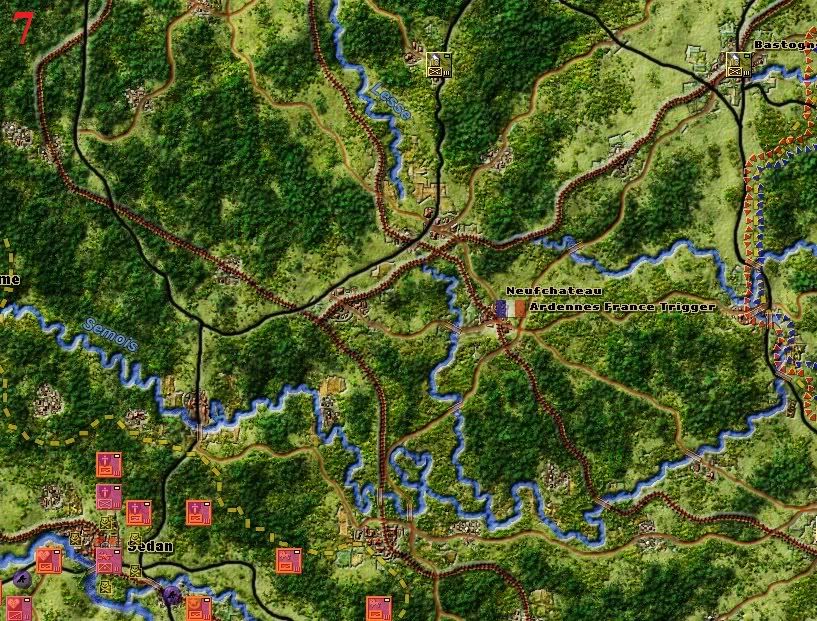
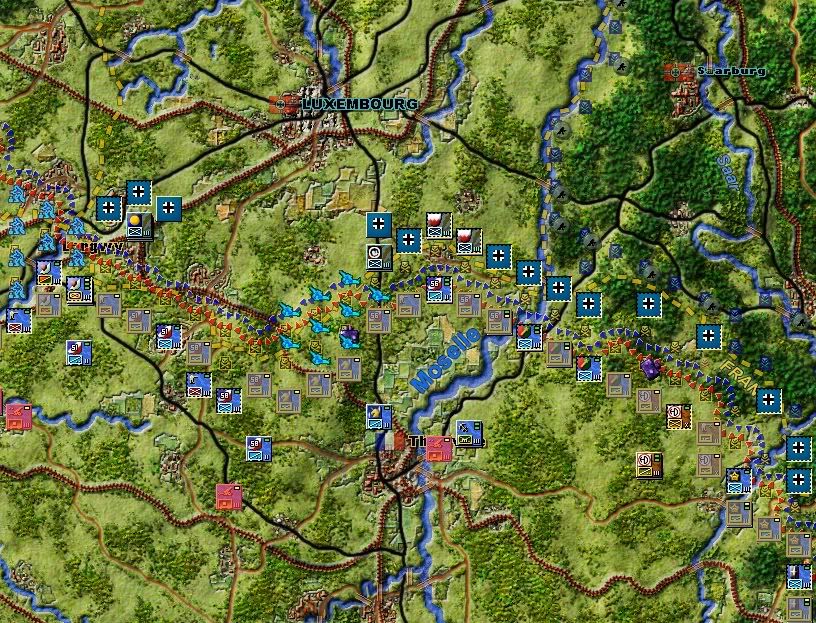
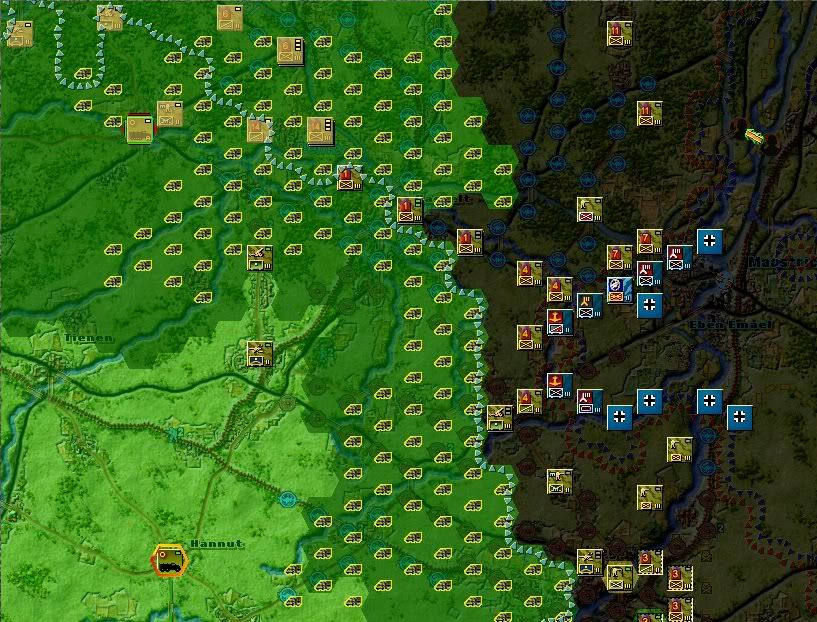
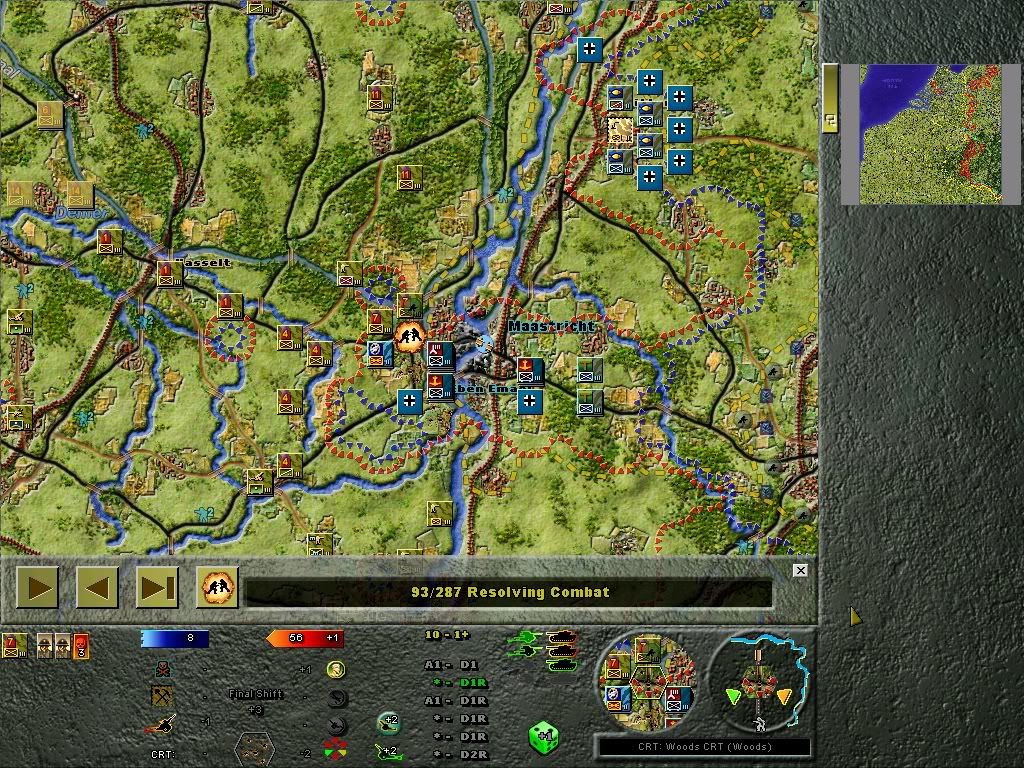
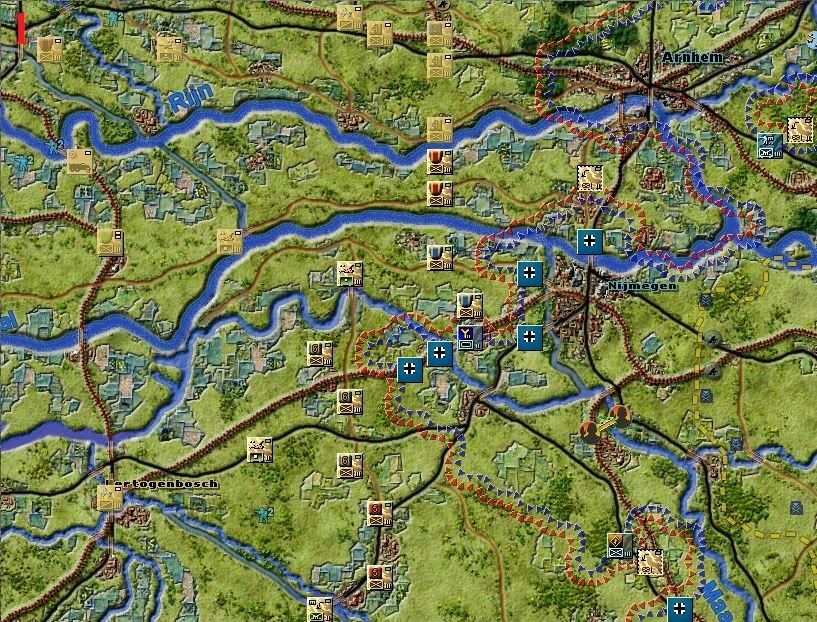
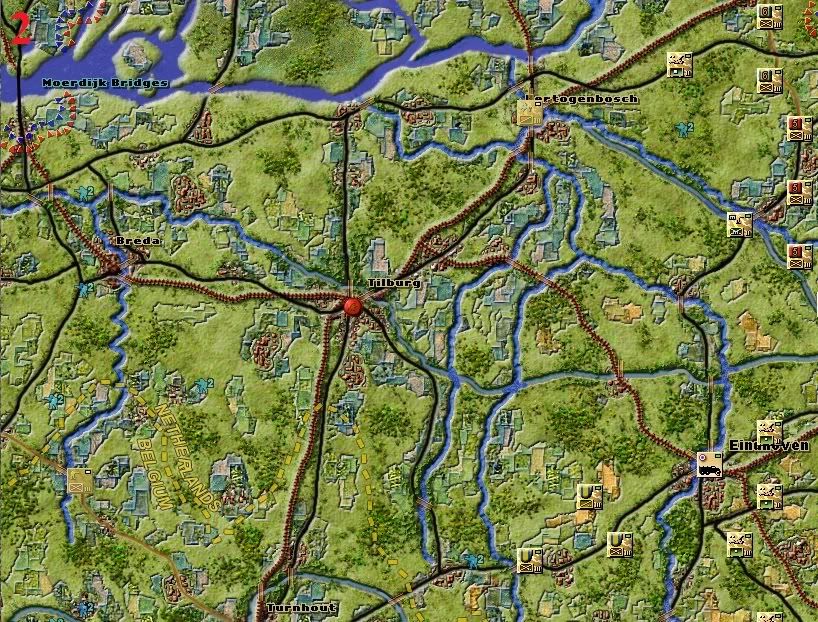
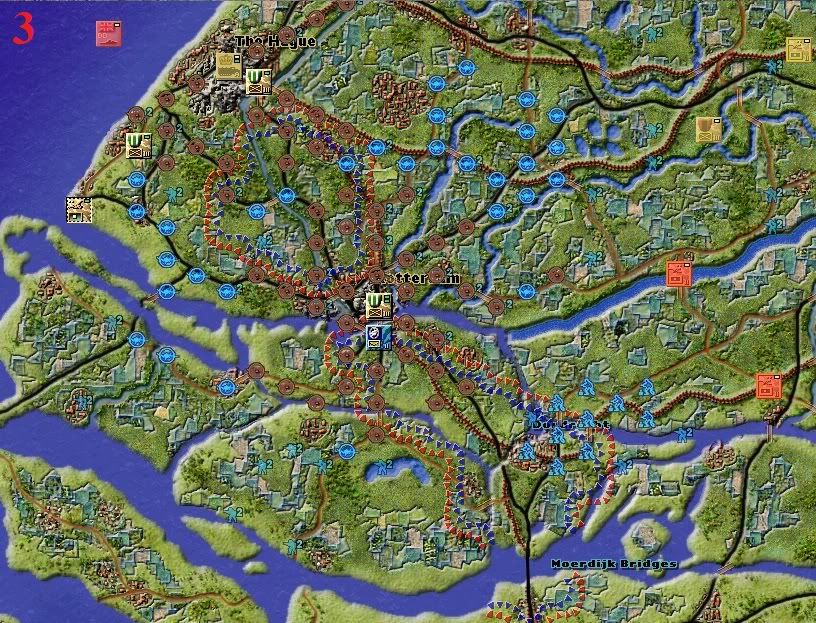
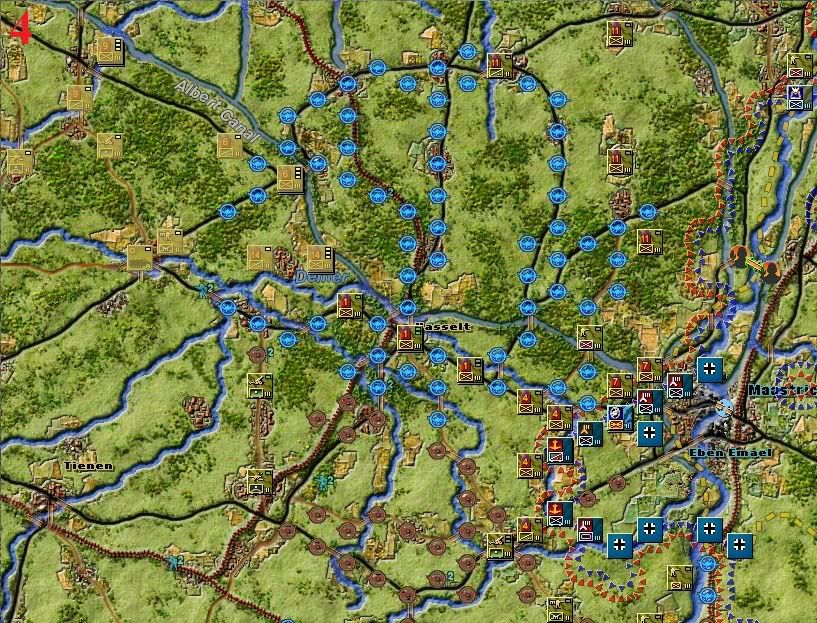
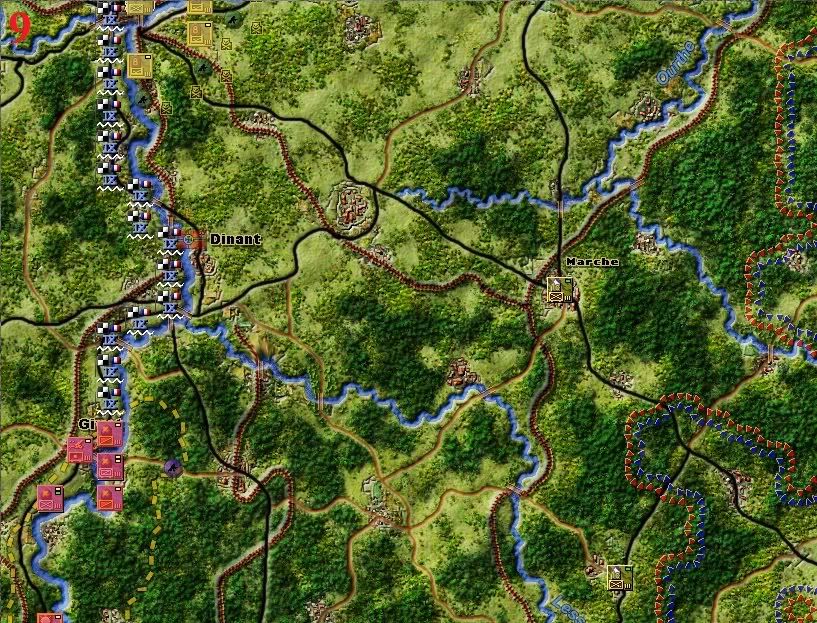
How are units supplied? There are a number of supply dumps on the map edges and in certains cities that provide supply. Supply travel freely along hexes as long as there are no movement penalties - be they imposed by enemy interdiction, enemy units, or anything that gives a movement penalty on a certain hex. That's where supply units come into play: supply units can "burst" supply over a certain number of interdicted hexes. Let's have a look at the Maastricht-Eben Emael area this turn.
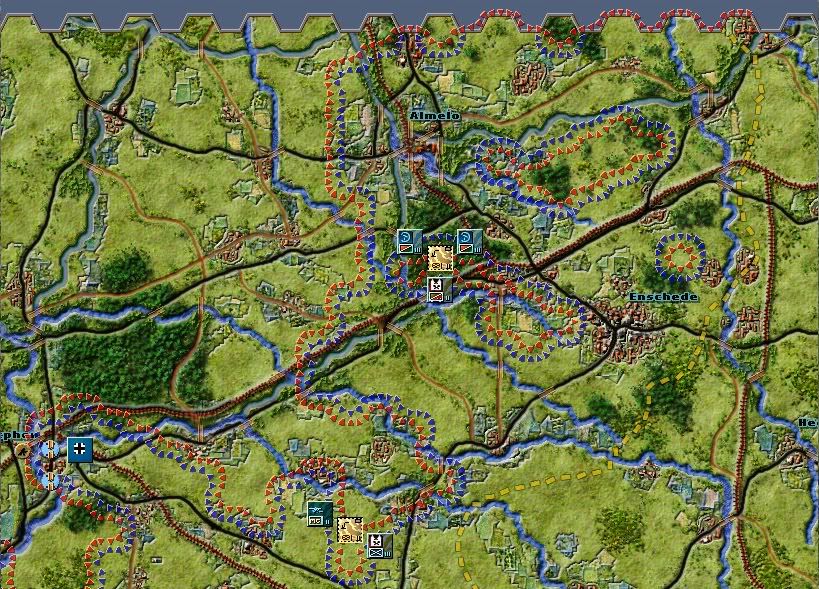
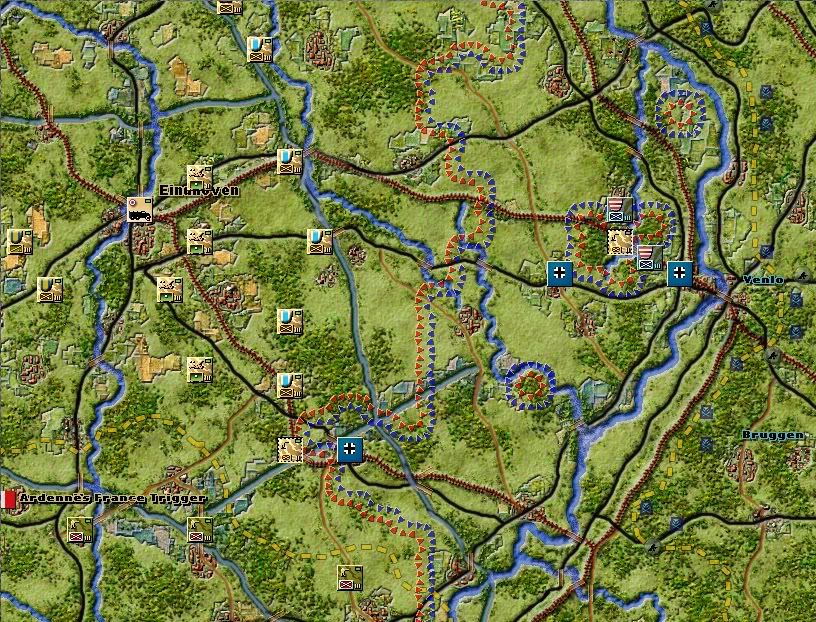
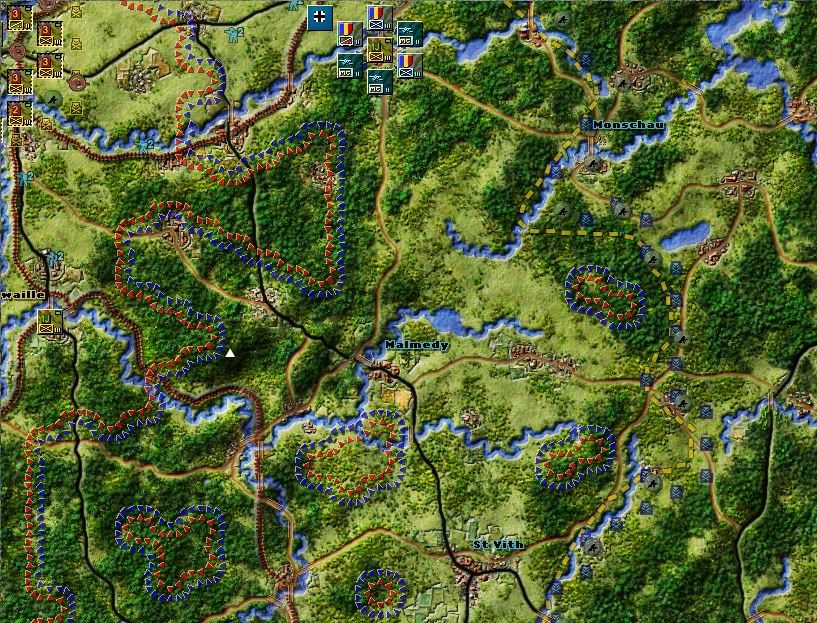
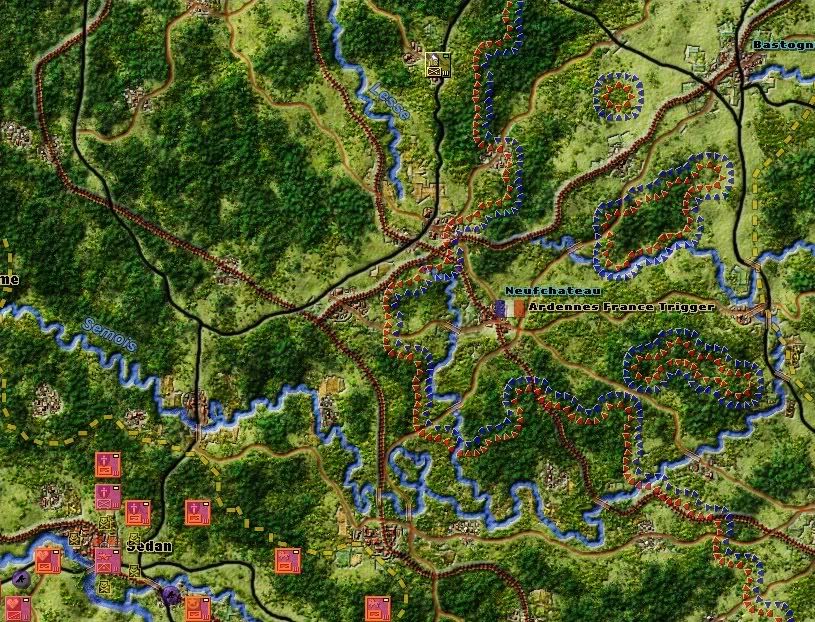
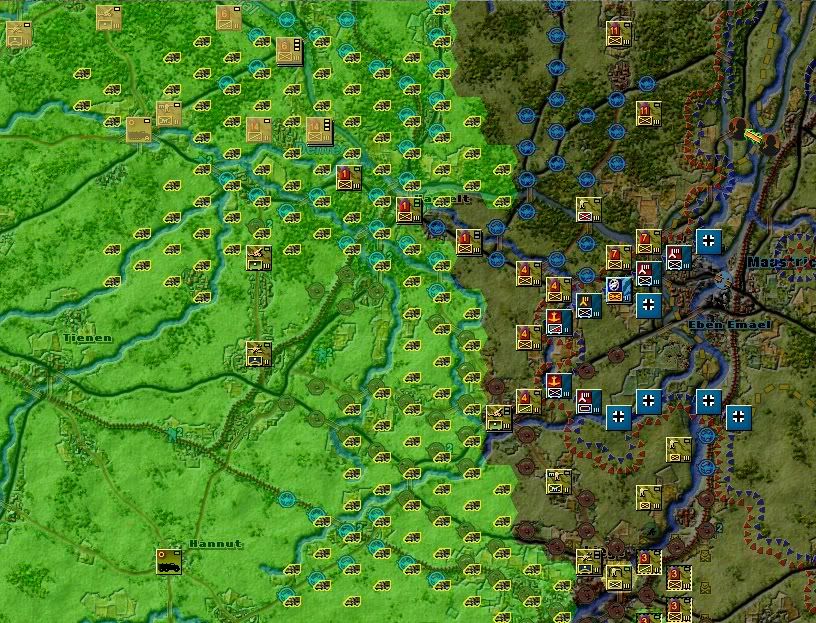
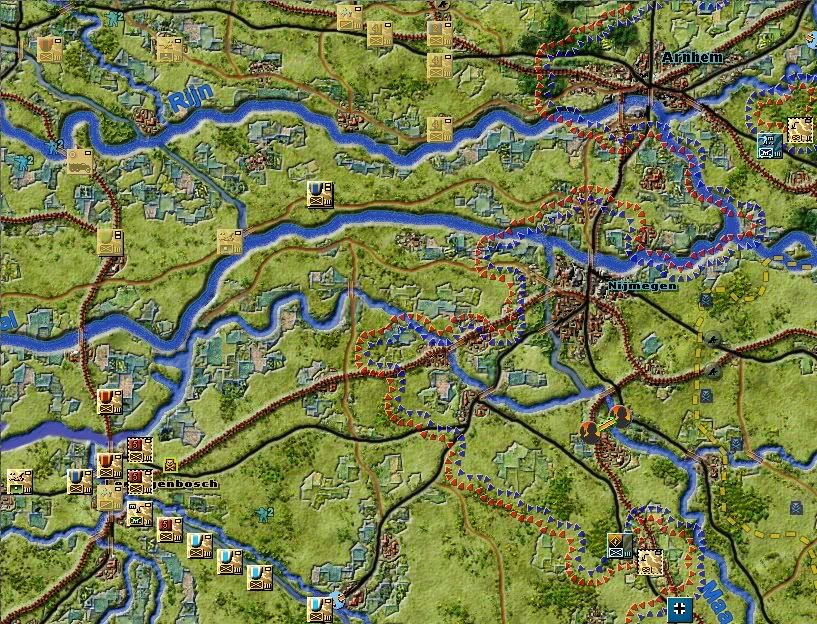
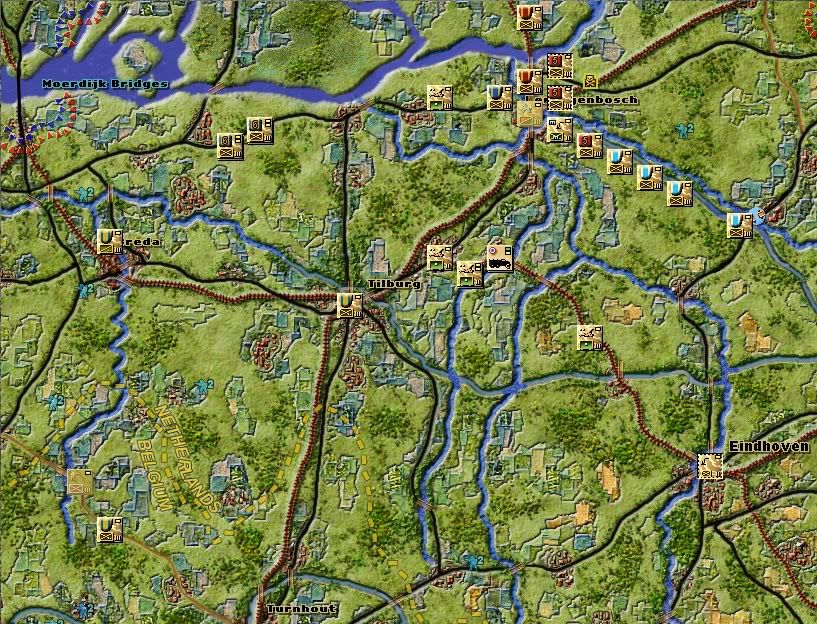
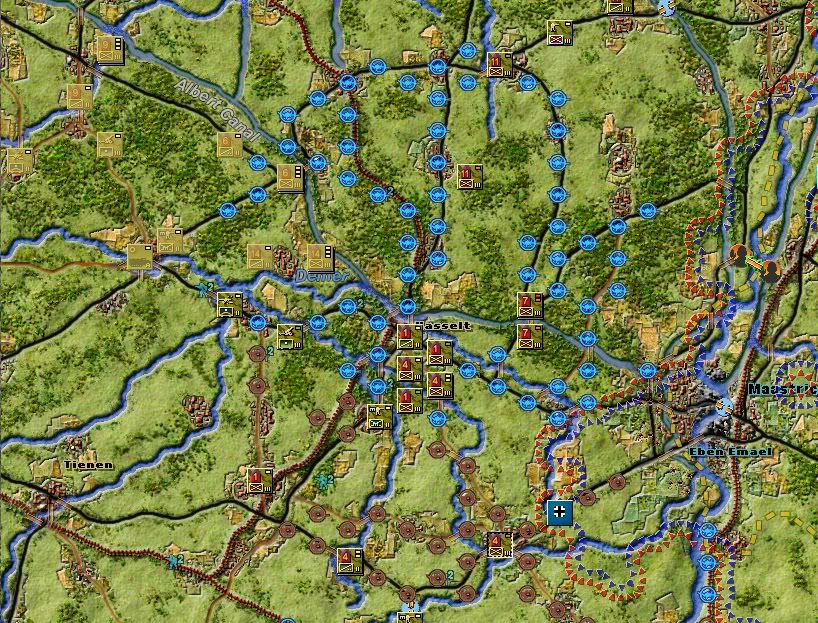
As you can see, the area is heavily interdicted. Let's turn on the supply net, which shows in green supplied hexes. Some Belgian units are already in non-supplied hexes, because enemy interdiction prevents supply from reaching them. They're not out of supply yet, because they haven't used their "bullets". But if they do so, they won't be re-supplied - and if they move, they won't get refueled.
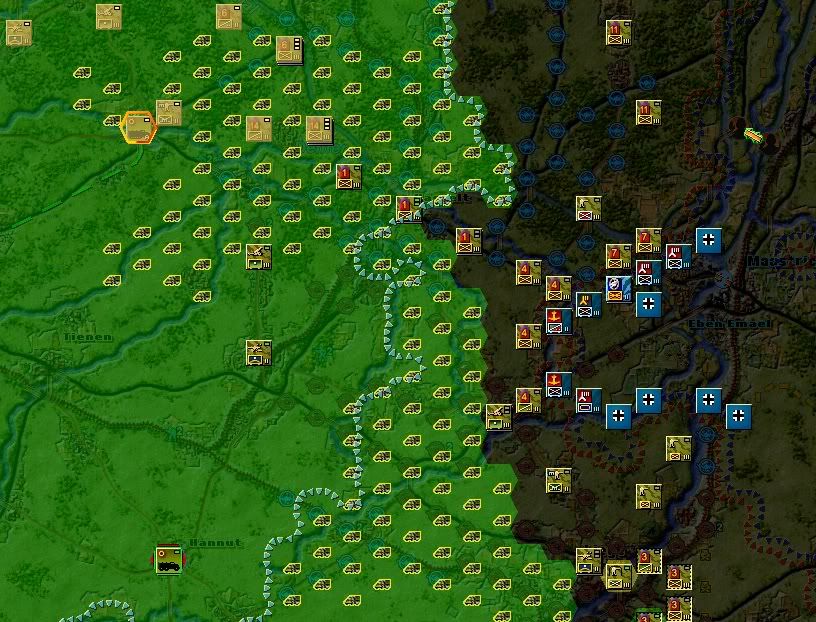
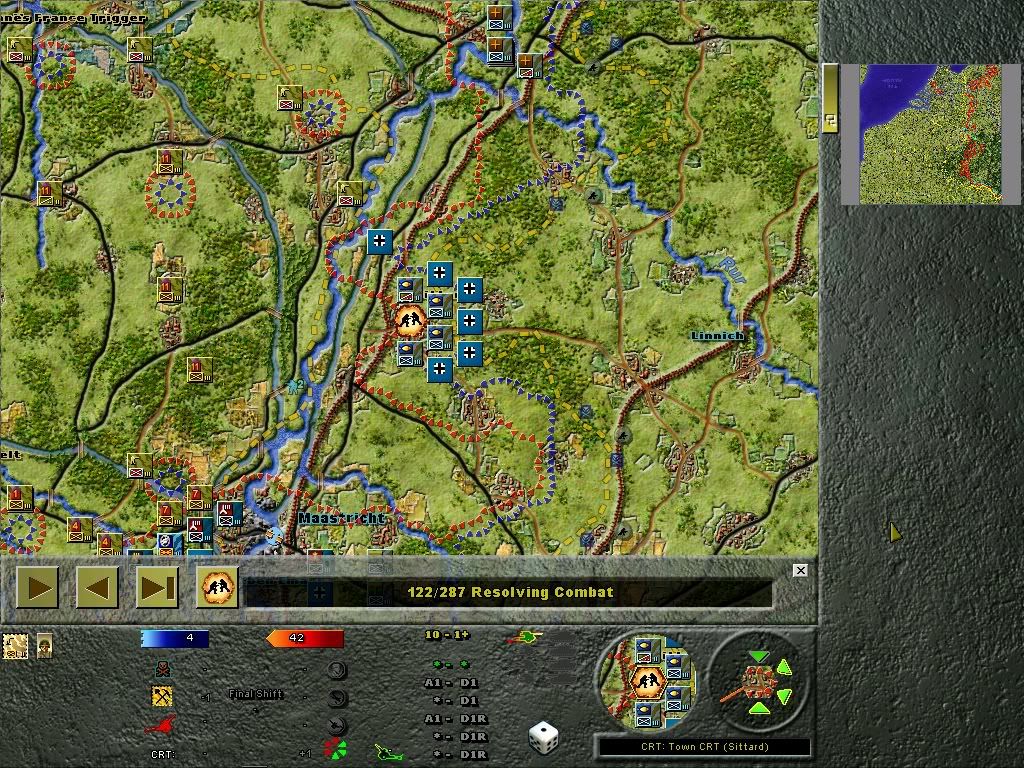
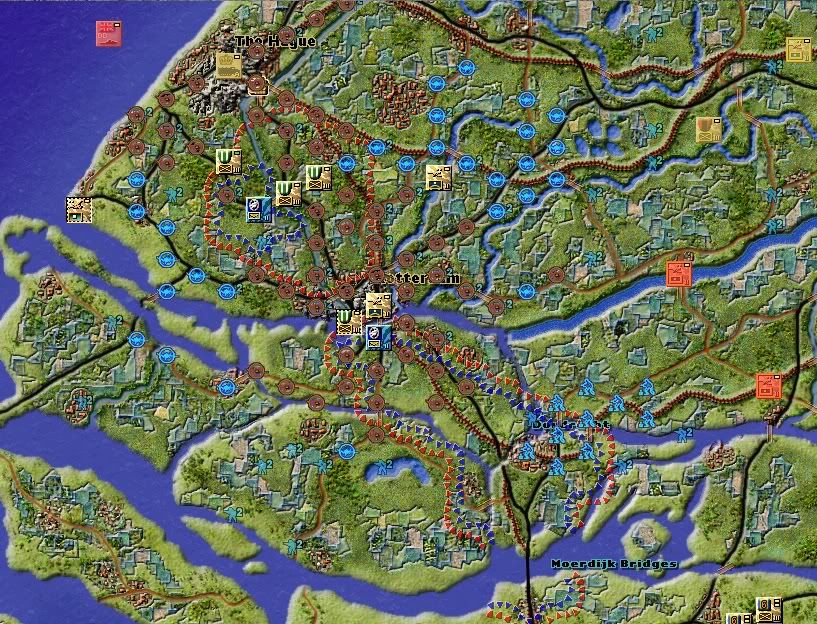
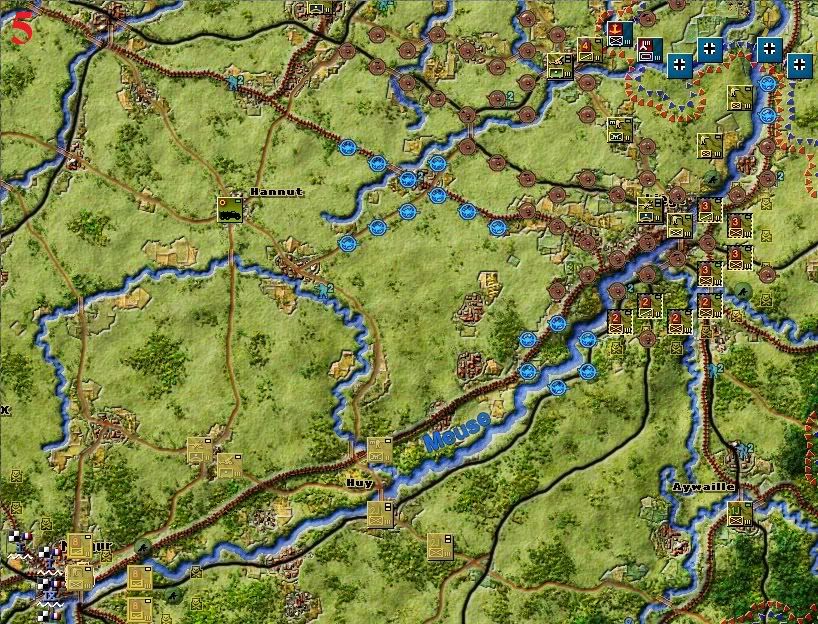
The green supplied hexes with yellow little trucks on it are hexes supplied not by supply dumps but by supply trucks. Each truck bursts a supply net. Let's check each of the two on-screen Belgian supply units' burst.
and
Here, you now have a glimpse of how supply work. Disambiguation time:
- a unit out of the green supply net is "not supplied"
REMEMBER THIS!
- a unit which has used all its bullets is "out of supply". Also called "isolated"
REMEMBER THIS!
Obviously, only "not supplied" units can become "out of supply/isolated" - but only when they've used all their bullets.
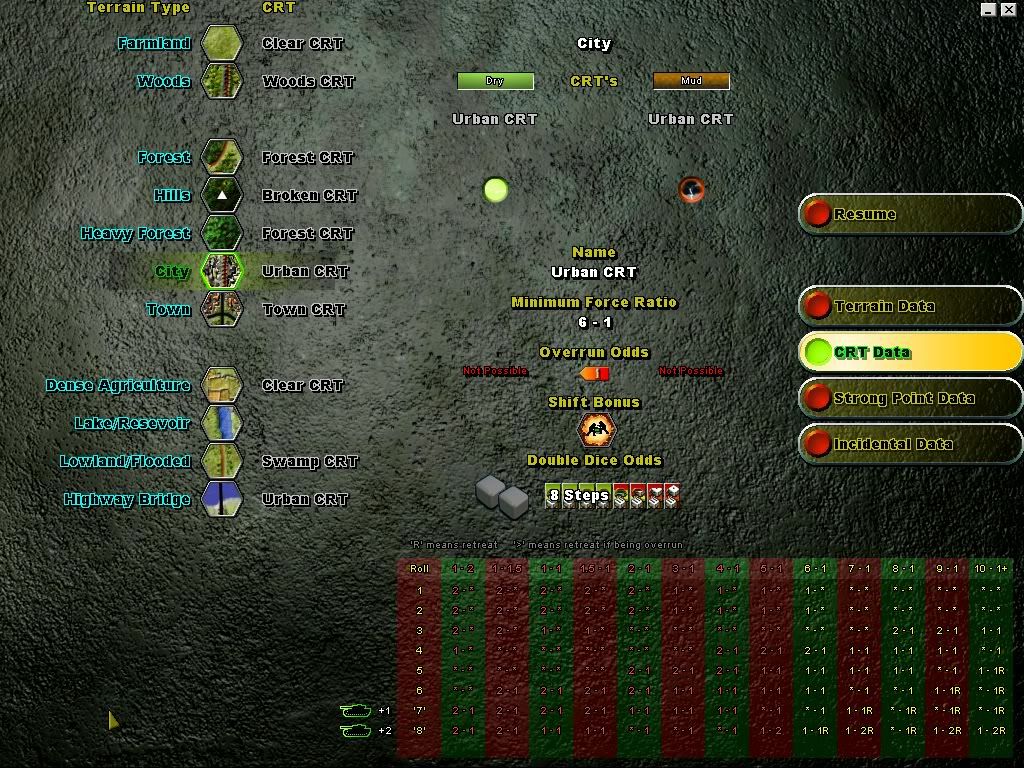
Combat
Wow sorry, this post is longer than I thought, sorry about that. I'll treat combat in a separate installement after I've played my turn.