


- Joined
- Jan 4, 2005
- Messages
- 24,793


Edit:
Chapter 2
Chapter 3
Chapter 4
Chapter 5
Chapter 6
Chapter 7
Chapter 8
Chapter 9
Chapter 10
Chapter 11
Chapter 12 - 1
Chapter 12 - 2
Chapter 12 - 3
Chapter 13
Chapter 14
Chapter 15
Chapter 16
Chapter 17
:arrow: Chapter 18
Fanart:
How to run Dark Omen in XP - read the WHOLE thread, it's kinda thrown in between the lines. Sorry.
---
All right, I am going to show you some hot Dark Omen action so unzip those pants and get yourself good and ready. We're going to play (yes, we, you're going to decide which
routes to take and what battles to fight, when the time comes) Warhammer: Dark Omen.

Let's see what Wikipedia says-
Sounds good enough. Dark Omen is basically Shadow of the Horned Rat, but with more comfort. Sadly it was also a bit dumbed down- there's no more realtime tactical map you can display during the battle and you can't even see the stats of your and the enemy's units. Stats? That's right, combat in Warhammer is decided entirely by dice-rolls, even if we won't be noticing that much.
The gameplay is basically real-time tactics- we have a battle and have to order our troops, ranging from cavalry, infantry, archers, artillery and wizards accordingly, minimising our losses and fulfilling certain objectives.
Let's start the game!

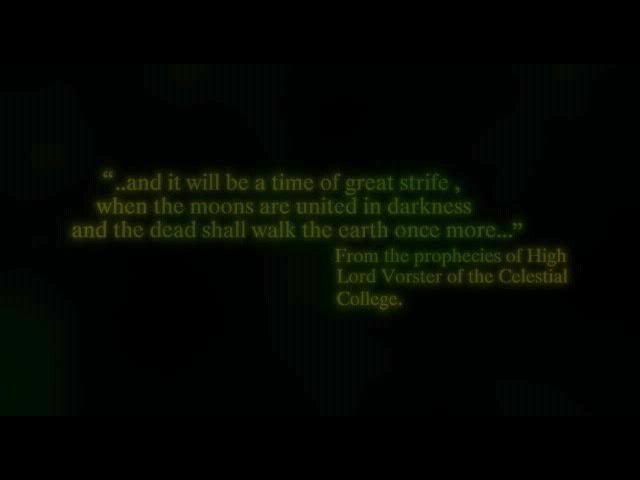
Generic prophecy for the win!

Pyramid? Eclipse? And what does it mean? (Oh, is it a dream?)
Uh...

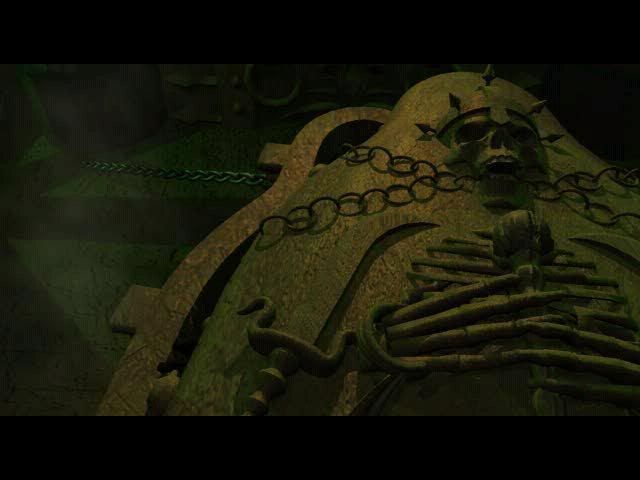
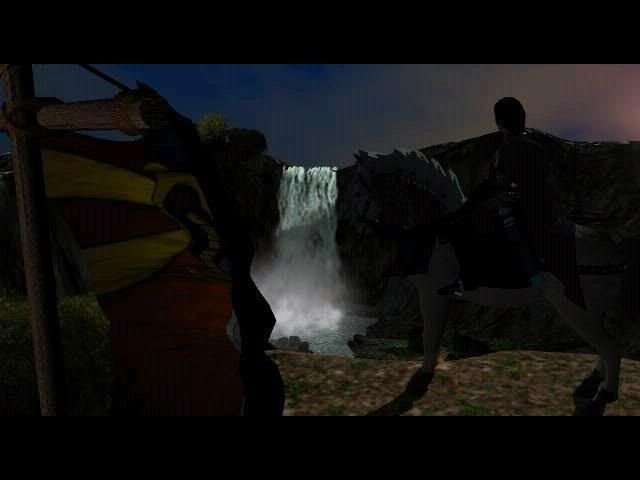
Well, damn. Seems like the undead walk again because their, uh what do I know, king or something has risen as foretold by the prophey. Oh well. Our heroes don't know much about this yet-
Wait, you ask, our heroes? Right you are-
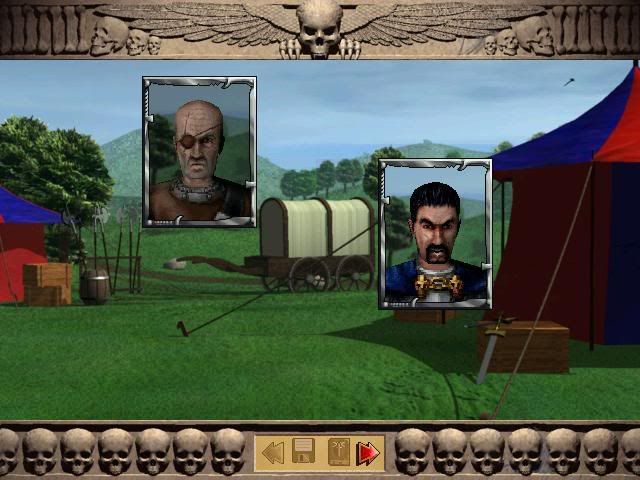
Meet the Dramatis personæ!
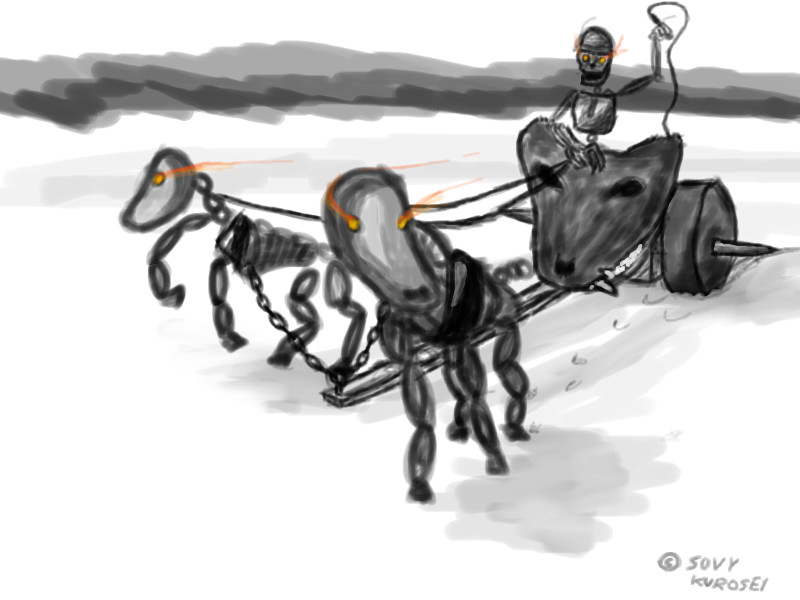
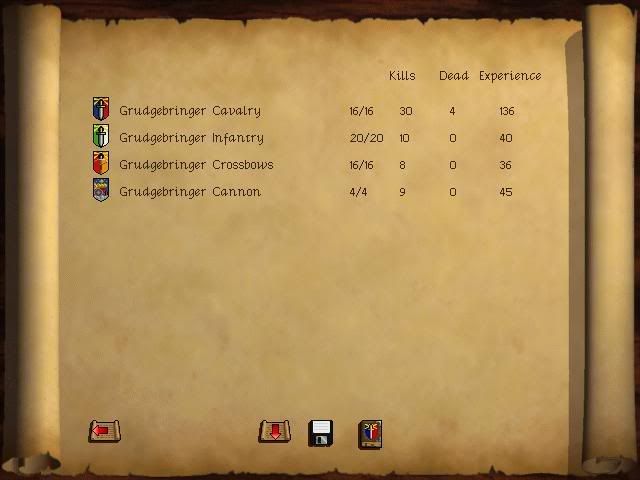
We are the Grudgebringers, sellswords that offer their blades for whoever can pay them, formed out of four core units. Their cavalry is led by COMMANDER Morgan Bernhardt, a master of collar-grabbing and kicking people into wells.
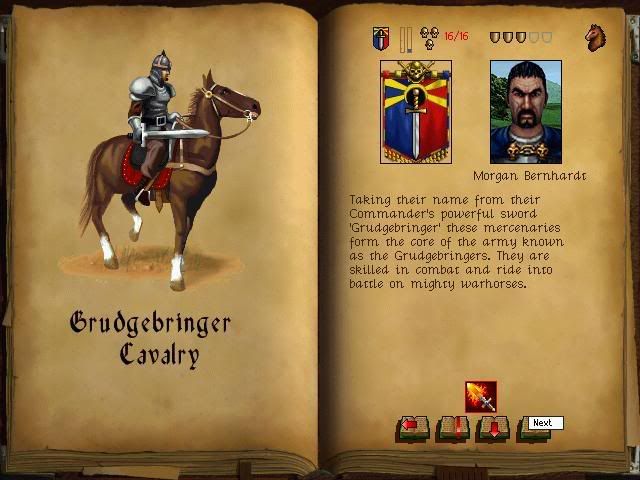
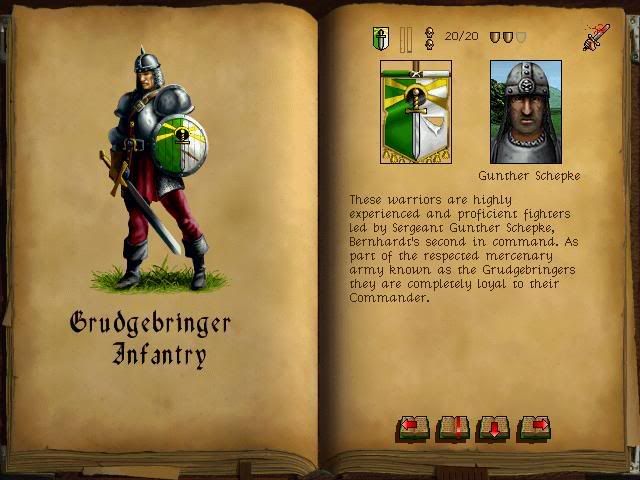
This is an obscenely powerful unit and will be the mainstay of our army, along with the next unit, the Grudgebringer Infantry led by good old Schepke, second in command,
Bernhardt's trusty sidekick. Rumour has it that he likes beer and pretzels.
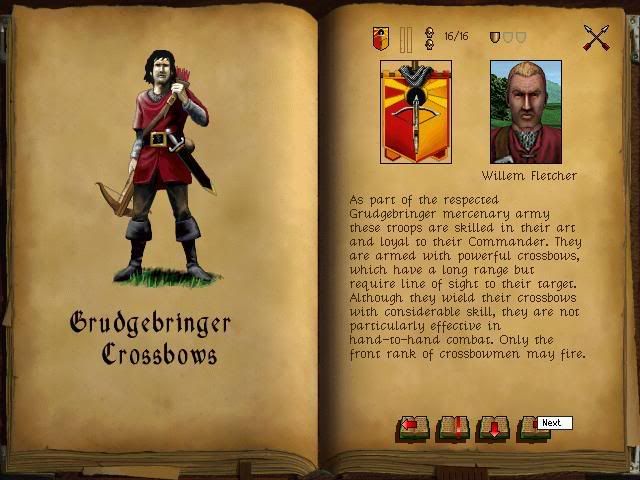
And now some old veterans from Shadow of the Horned Rat, the ex-bandits under Fletcher, a trusty unit of crossbowmen who saved our ass more times than I'd like to admit back in SotHR.
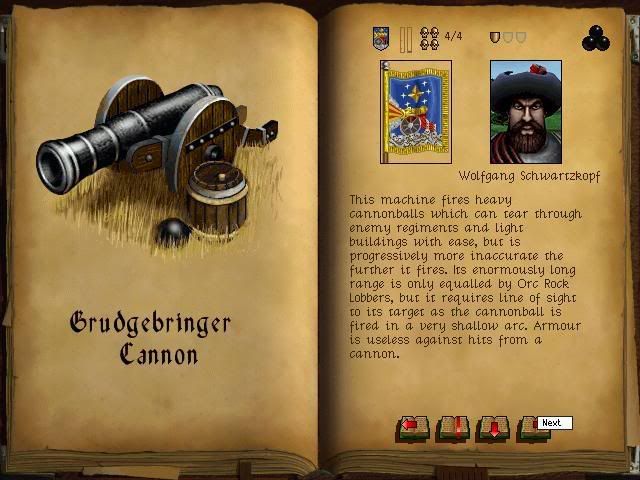
...and lastly, the guys that make things go boom.
Our rag-tag rough and tumble mercenary unit is named after the powerful sword "Grudgebringer". After all, this wouldn't be a fantasy setting without named swords. Behold!

That's right, Bernhardt can set people on fire with it.
But where was I? All this exposition made my text-formatting mess up. Oh well- as I was saying, our heroes don't even know of the rising undead yet... in fact...
"Unaware of the evil forces gathering south Commander Berhnardt gathers his mercenary army, the Grudgebringers, to defend a small trading post against an attack by goblins."
---
Battle 1 - Defending the Trading Post
Objective: Defend the trading post and repel all goblins that try to get past your defensive line!
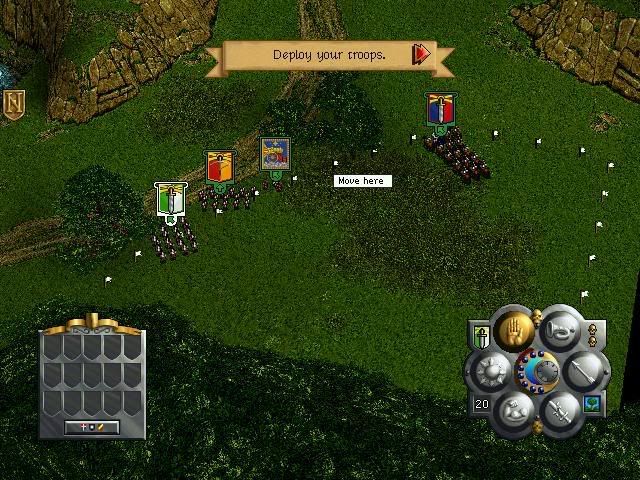
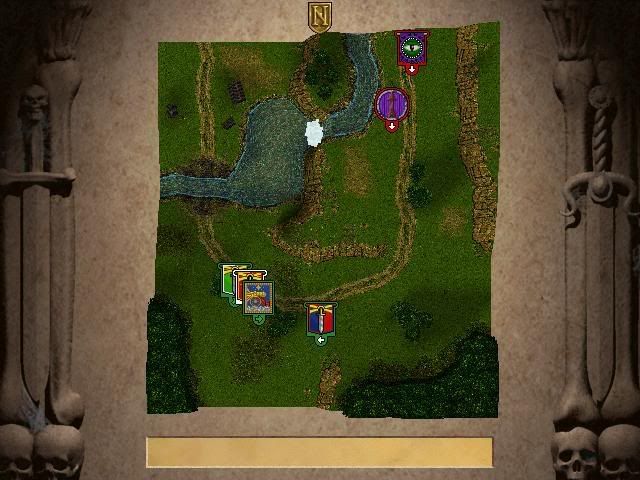
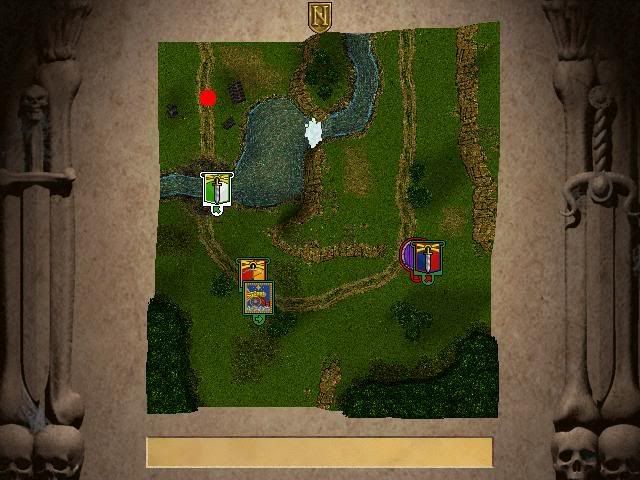
At the beginning of a mission, we are allowed to deploy our units in the marked area. Unit deployment is imperative to success in some missions. The placement of the artillery is especially crucial since it has to be dug in and can not be moved once the battle starts. We place our forces close to the road since we know that the goblins will come from there to attack the post. They're in for a surprise.
Oh dear, some archer goblins trying to assail us with their arrows. They're moving to a ledge... if they get there in time we're screwed since our cannon-men and troups would be in plain sight- We order our ranged troops to focus on shooting them.
Success! A direct hit with the cannon kills half of the goblin archers and they fail their morale check and run. They are still at half unit size and will most likely regroup, but let's hope not- we got other worries. Like the unit of goblins rapidly advancing down the road!
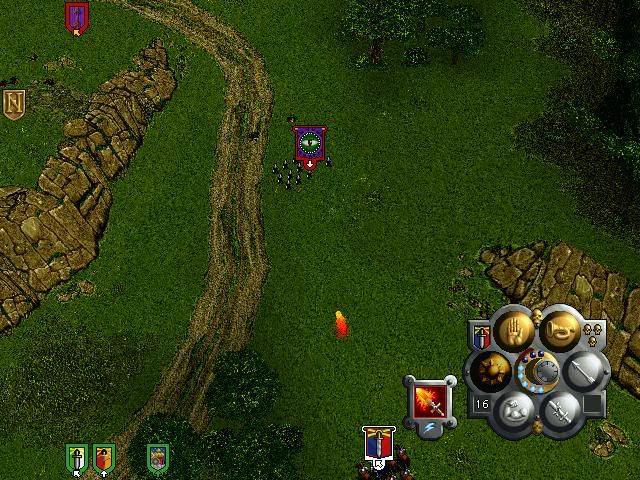
They're in for a warm welcome- the Grudgebringer sword roasts one, then our cavalry charges their ranks- the ensuing battle is a lot more fierce than I predicted, our four men are killed before the goblins flee from us- we won't allow a single one to live!
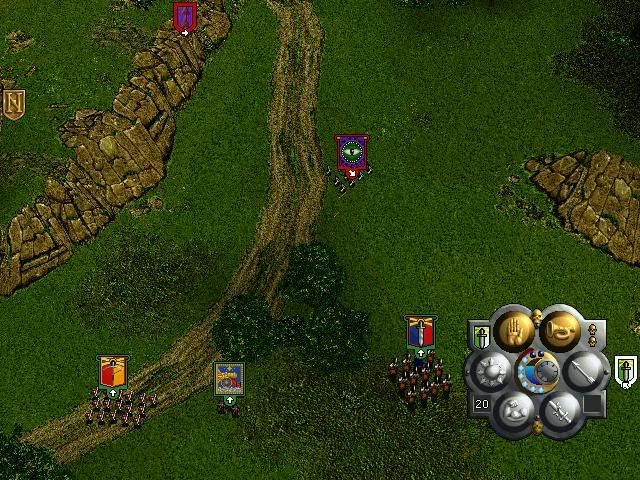
Die, goblins, die! You will notice that there is an arrow on the top of the screen, pointing to us. This means the goblin archers we maimed with the cannon have regrouped and are advancing into a position to pelt us with arrows!
We won't let them- under the cover of those trees our cavalry, very mobile and deadly, rounds the trees and charges into the back of the goblins, our swords cutting through them as if they were, and I am thinking of KC here and avoiding a cliche, made of chocolate that has been heated in an oven for a few minutes.
Damn- a few got away. When a regiment manages to flee to the boundaries of the map or a wood that is connected to the edge of the map, they manage to retreat from the battle. Well, guess we are victorious-
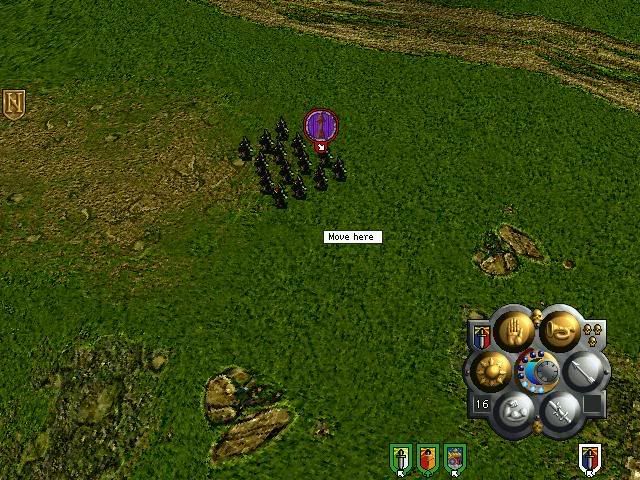
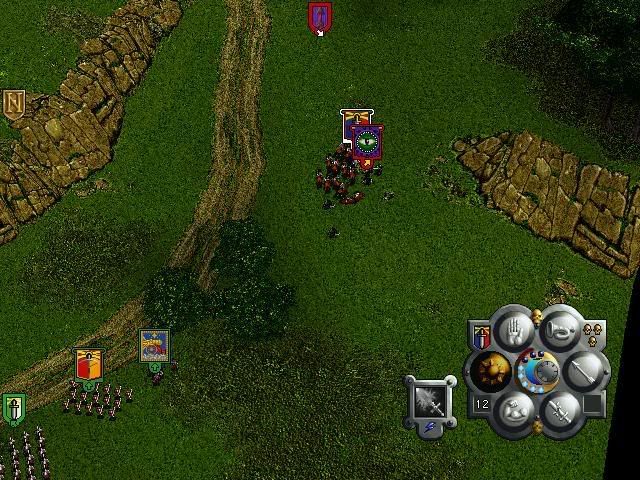
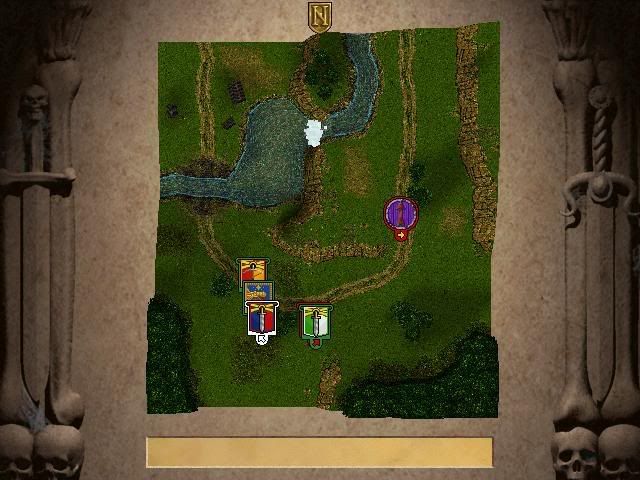
...guess again! They throw another slew of worthless goblins at us. Here you can see the tactical map. Unlike in SotHR you don't see it permanently and have to hit space to access it, and you can't even give orders on it, which is pretty jarring, but oh well. We retreat the cavalry to set up an ambush for the goblin stickers, the goblin cannonfodder, our artillery making sure no archers set up shop at the cliff just northeast of the deployment zone.
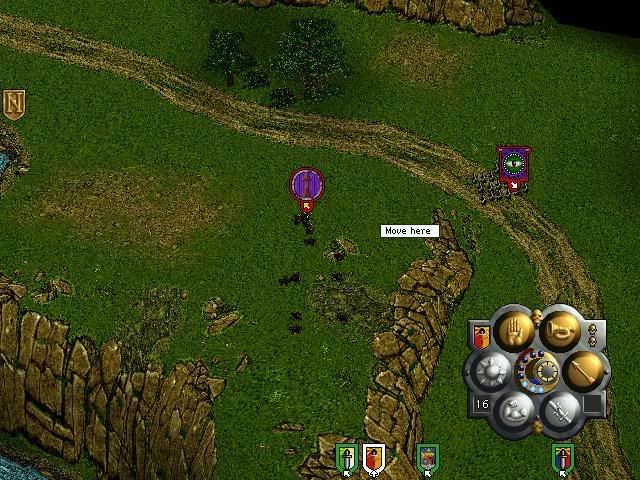
As you can see, they try to move towards the trading post to the northwest and run right into our trap- the crossbows weaken the goblin unit. As you may also be able to see, their archers have no chance to attack us since the cannon keeps firing at the ledge just northeast- if they moved there they'd be killed as easily as the first group of goblin archers.
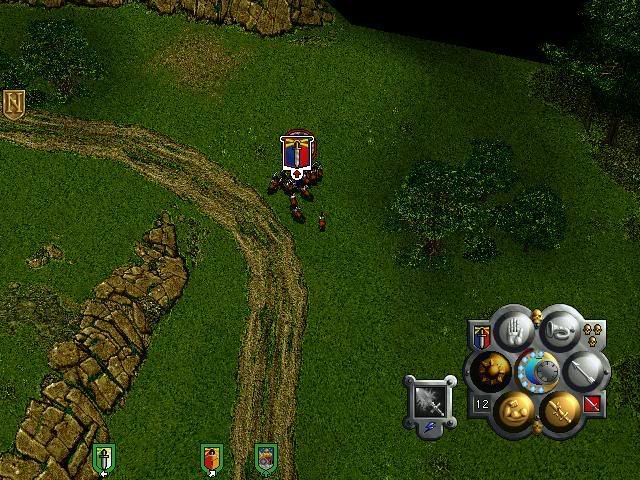
To save cavalry - 4 men died fighting the first wave of goblins - we use our Grudgebringer Infantry to mince the gobbos that survived the waves of the archers. Another beautiful little detail of Dark Omen: Unlike Shadow of the Horned Rat, units don't have an AI toggle anymore. What this means is that cannons, mortars and archers will keep firing at an enemy unit even if they close in for melee with one of your units- this is devastating, so you, as the commander, have to manually stop them from firing each time the enemy closes in.
As you can see above, our cannon scored another lucky hit while our infantry fights- this made the goblin archers retreat, their white arrow became yellow. After a glorious battle, the goblins all die... well, except for those fleeing archers that have regrouped.
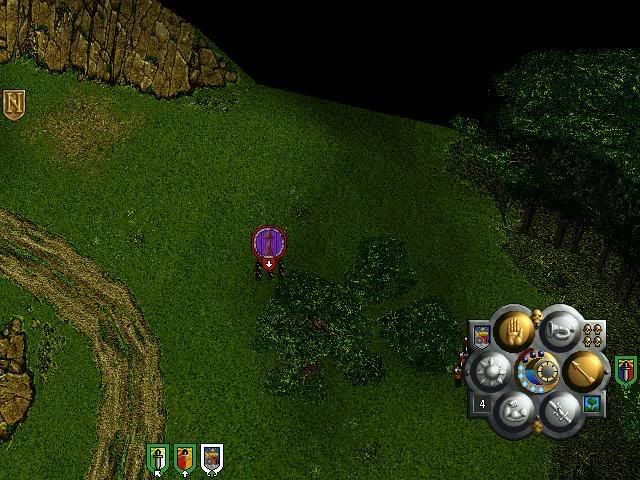
Commander Bernhardt doesn't approve of them and runs them all down. Victory! Everything is quiet- well, that's a lie. The ravens start to descend and feast on the fallen and the horses stomp their hooves uneasily. Will we face more goblins? Time passes- and no more goblins come. We saved the trading post, misison complete! Just one little detail-
See that circle? If we go there we see...
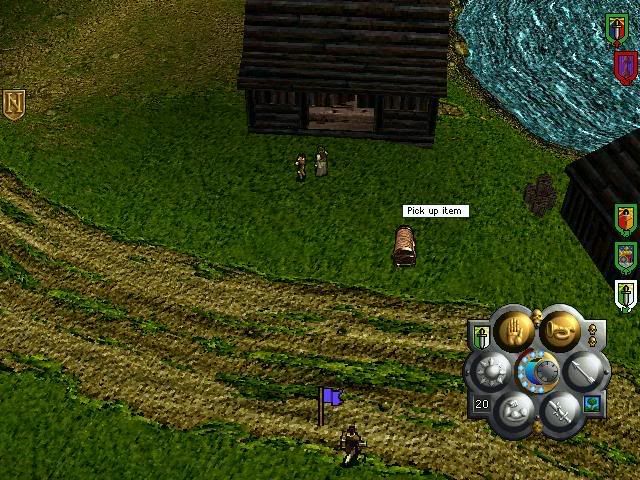
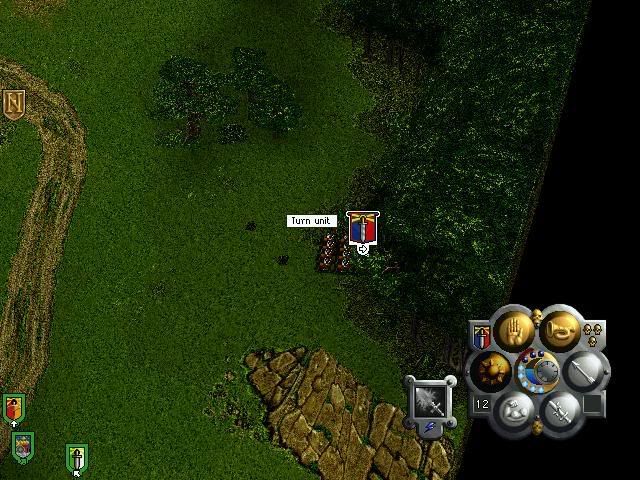
...a treasure chest someone happened to drop in the middle of the trading post! Awesome. We grab it and are off. If you're curious, it contains 150 coins.
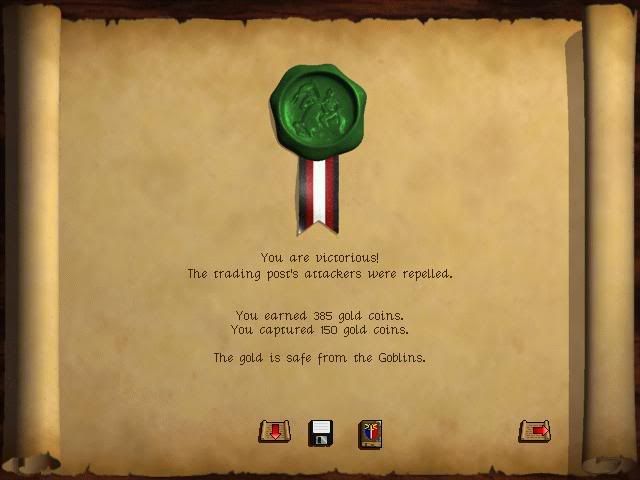
Here we say our pay as well as the things we picked up, like the treasure chest with the coins.
Could have been better!

All that is left is to hire some able-bodied men that know how to hold a sword and can ride to fill up our Cavalry...
After the battle we have a little chat with an old friend-
:evil: (Morgan Bernhardt) A battleground is a banquet of dead men's flesh. The crows are dining well (IN HELL). Win or lose, the crows never go hungry, eh, Claus?
 (Klaus) Death, some say, is its own reward, Morgan.
:evil: If death is a reward I will take it in gold coin old friend, preferably from emperor Karl Franz. That man owes me.
Perhaps he is about to pay. You have been summonend to the imperial court in Altdorf. Immediate departure. Reason unknown.
:evil: Who told you this?
An imperial courier. He rode in during the battle. It would seem the emperor has need of a mercenary commander who deals with death in gold coin.
:evil: Then I will not disappoint and he better not disappoint me. Get ready to march to Altdorf!
To be continued... if it isn't too boring. Improvements and criticism encouraged.
Chapter 2
Chapter 3
Chapter 4
Chapter 5
Chapter 6
Chapter 7
Chapter 8
Chapter 9
Chapter 10
Chapter 11
Chapter 12 - 1
Chapter 12 - 2
Chapter 12 - 3
Chapter 13
Chapter 14
Chapter 15
Chapter 16
Chapter 17
:arrow: Chapter 18
Fanart:
How to run Dark Omen in XP - read the WHOLE thread, it's kinda thrown in between the lines. Sorry.
---
All right, I am going to show you some hot Dark Omen action so unzip those pants and get yourself good and ready. We're going to play (yes, we, you're going to decide which
routes to take and what battles to fight, when the time comes) Warhammer: Dark Omen.
Let's see what Wikipedia says-
Wikipedia said:Warhammer: Dark Omen, the sequel to Warhammer: Shadow of the Horned Rat (1995), is a real-time tactical wargame and is considered one of the first real-time tactical (RTT) games.
Rendered entirely in a freely rotatable- and zoomable steep isometric 3D overhead perspective, the game features for its time remarkable 3D graphics of terrain, terrain features and buildings, and advanced support of the first-generation Voodoo 3dfx 3D accelerator card effects. The 3D terrain and features are combined with 2D sprites ("billboarding") to render the hundreds of individual units simultaneously on-screen on the limited hardware of 1998; a technique still employed in games many years later, a good example being the essentially similar game Shogun: Total War (2000). Warhammer: Dark Omen is based on the Warhammer Fantasy Battle miniature tabletop wargame rules and situated in the Old World in the Warhammer Fantasy world (particularly in The Empire's southern regions) and makes good use of the vast background, creating a deeply engrossing storyline that develops over the course of the game through illustrations and voice acted conversations. The enemy AI is poor, relying on scripts rather than adaptive logic, something which is attempted to be compensated by the player's forces being heavily outnumbered throughout the game.
Sounds good enough. Dark Omen is basically Shadow of the Horned Rat, but with more comfort. Sadly it was also a bit dumbed down- there's no more realtime tactical map you can display during the battle and you can't even see the stats of your and the enemy's units. Stats? That's right, combat in Warhammer is decided entirely by dice-rolls, even if we won't be noticing that much.
The gameplay is basically real-time tactics- we have a battle and have to order our troops, ranging from cavalry, infantry, archers, artillery and wizards accordingly, minimising our losses and fulfilling certain objectives.
Let's start the game!
Generic prophecy for the win!
Pyramid? Eclipse? And what does it mean? (Oh, is it a dream?)
Uh...
Well, damn. Seems like the undead walk again because their, uh what do I know, king or something has risen as foretold by the prophey. Oh well. Our heroes don't know much about this yet-
Wait, you ask, our heroes? Right you are-
Meet the Dramatis personæ!
We are the Grudgebringers, sellswords that offer their blades for whoever can pay them, formed out of four core units. Their cavalry is led by COMMANDER Morgan Bernhardt, a master of collar-grabbing and kicking people into wells.
This is an obscenely powerful unit and will be the mainstay of our army, along with the next unit, the Grudgebringer Infantry led by good old Schepke, second in command,
Bernhardt's trusty sidekick. Rumour has it that he likes beer and pretzels.
And now some old veterans from Shadow of the Horned Rat, the ex-bandits under Fletcher, a trusty unit of crossbowmen who saved our ass more times than I'd like to admit back in SotHR.
...and lastly, the guys that make things go boom.
Our rag-tag rough and tumble mercenary unit is named after the powerful sword "Grudgebringer". After all, this wouldn't be a fantasy setting without named swords. Behold!
That's right, Bernhardt can set people on fire with it.
But where was I? All this exposition made my text-formatting mess up. Oh well- as I was saying, our heroes don't even know of the rising undead yet... in fact...
"Unaware of the evil forces gathering south Commander Berhnardt gathers his mercenary army, the Grudgebringers, to defend a small trading post against an attack by goblins."
---
Battle 1 - Defending the Trading Post
Objective: Defend the trading post and repel all goblins that try to get past your defensive line!
At the beginning of a mission, we are allowed to deploy our units in the marked area. Unit deployment is imperative to success in some missions. The placement of the artillery is especially crucial since it has to be dug in and can not be moved once the battle starts. We place our forces close to the road since we know that the goblins will come from there to attack the post. They're in for a surprise.
Oh dear, some archer goblins trying to assail us with their arrows. They're moving to a ledge... if they get there in time we're screwed since our cannon-men and troups would be in plain sight- We order our ranged troops to focus on shooting them.
Success! A direct hit with the cannon kills half of the goblin archers and they fail their morale check and run. They are still at half unit size and will most likely regroup, but let's hope not- we got other worries. Like the unit of goblins rapidly advancing down the road!
They're in for a warm welcome- the Grudgebringer sword roasts one, then our cavalry charges their ranks- the ensuing battle is a lot more fierce than I predicted, our four men are killed before the goblins flee from us- we won't allow a single one to live!
Die, goblins, die! You will notice that there is an arrow on the top of the screen, pointing to us. This means the goblin archers we maimed with the cannon have regrouped and are advancing into a position to pelt us with arrows!
We won't let them- under the cover of those trees our cavalry, very mobile and deadly, rounds the trees and charges into the back of the goblins, our swords cutting through them as if they were, and I am thinking of KC here and avoiding a cliche, made of chocolate that has been heated in an oven for a few minutes.
Damn- a few got away. When a regiment manages to flee to the boundaries of the map or a wood that is connected to the edge of the map, they manage to retreat from the battle. Well, guess we are victorious-
...guess again! They throw another slew of worthless goblins at us. Here you can see the tactical map. Unlike in SotHR you don't see it permanently and have to hit space to access it, and you can't even give orders on it, which is pretty jarring, but oh well. We retreat the cavalry to set up an ambush for the goblin stickers, the goblin cannonfodder, our artillery making sure no archers set up shop at the cliff just northeast of the deployment zone.
As you can see, they try to move towards the trading post to the northwest and run right into our trap- the crossbows weaken the goblin unit. As you may also be able to see, their archers have no chance to attack us since the cannon keeps firing at the ledge just northeast- if they moved there they'd be killed as easily as the first group of goblin archers.
To save cavalry - 4 men died fighting the first wave of goblins - we use our Grudgebringer Infantry to mince the gobbos that survived the waves of the archers. Another beautiful little detail of Dark Omen: Unlike Shadow of the Horned Rat, units don't have an AI toggle anymore. What this means is that cannons, mortars and archers will keep firing at an enemy unit even if they close in for melee with one of your units- this is devastating, so you, as the commander, have to manually stop them from firing each time the enemy closes in.
As you can see above, our cannon scored another lucky hit while our infantry fights- this made the goblin archers retreat, their white arrow became yellow. After a glorious battle, the goblins all die... well, except for those fleeing archers that have regrouped.
Commander Bernhardt doesn't approve of them and runs them all down. Victory! Everything is quiet- well, that's a lie. The ravens start to descend and feast on the fallen and the horses stomp their hooves uneasily. Will we face more goblins? Time passes- and no more goblins come. We saved the trading post, misison complete! Just one little detail-
See that circle? If we go there we see...
...a treasure chest someone happened to drop in the middle of the trading post! Awesome. We grab it and are off. If you're curious, it contains 150 coins.
Here we say our pay as well as the things we picked up, like the treasure chest with the coins.
Could have been better!
All that is left is to hire some able-bodied men that know how to hold a sword and can ride to fill up our Cavalry...
After the battle we have a little chat with an old friend-
:evil: (Morgan Bernhardt) A battleground is a banquet of dead men's flesh. The crows are dining well (IN HELL). Win or lose, the crows never go hungry, eh, Claus?
(Klaus) Death, some say, is its own reward, Morgan.:evil: If death is a reward I will take it in gold coin old friend, preferably from emperor Karl Franz. That man owes me.
Perhaps he is about to pay. You have been summonend to the imperial court in Altdorf. Immediate departure. Reason unknown.:evil: Who told you this?
An imperial courier. He rode in during the battle. It would seem the emperor has need of a mercenary commander who deals with death in gold coin.:evil: Then I will not disappoint and he better not disappoint me. Get ready to march to Altdorf!
To be continued... if it isn't too boring. Improvements and criticism encouraged.


